Do you use Microsoft Teams? Do you want a simpler way to manage your employees' days off?
If so, you've landed on the right article, your working life is about to get a whole lot easier 👏
There are two ways to add annual leave to your Microsoft Teams Calendar: the not-so-straightforward method, and the straightforward one.
- Just use the Teams Calendar: Surprisingly, this isn’t the easy way...! Despite being a powerful tool for communication and collaboration, the Teams calendar just isn’t built to be a comprehensive leave tracker. As you’ll see below, adding annual leave directly to your Teams calendar involves several steps.
- Use Timetastic, and sync with Teams. Now this is a nicer option. Timetastic is a tracker app for managing all aspects of leave – from planning holidays to tracking absences – and it integrates beautifully with Teams. Your Timetastic vacation tracker will automatically update your Teams calendar with holiday dates, sick leave, and any other type of leave across your entire organisation. No need for manual data entry – you can even use it via Teams chat.
We’ll show you both methods in the tutorial below. We'll also highlight a really smart part of the integration that makes leave tracking easier than you might ever imagine, whether you’re a requester or an approver.
(If you prefer a hands-on approach, you can jump straight into a free trial of Timetastic? You might find that setting it up and syncing leave with your Teams calendar is quicker than you expected.)
Start a free trial of Timetastic today.
Adding annual leave to your Teams calendar (via Teams)
Firstly, Teams syncs data from Outlook, they are kind of one-and-the-same-thing. So if you’ve already added annual leave to your Outlook calendar, it’ll pull that data through.
If you haven't already synced your annual leave from Outlook, or if you prefer to manage your leave directly in Teams, you'll need to manually input each leave period as a meeting in Teams.
Here's a step-by-step walkthrough to help you do this:
1. Open Microsoft Teams: Start by launching the Teams application on your device. Make sure you're logged in with your work account.
2. Access the calendar: Once in Teams, navigate to the Calendar tab. This is usually located on the left-hand side toolbar. Clicking on it will display your current calendar schedule.
3. Create a new event: To add your leave, click on the "New Meeting" button. This might seem a bit counterintuitive since you're not actually scheduling a meeting, but it's the way to block out time in your calendar. Although the button is labeled "New Meeting," Teams currently uses this option for creating any type of calendar event including all the different leave types.
4. Set the event details: In the new event window, you’ll need to fill out the details of your leave. Start by giving the event a clear title, like "Annual Leave" or "Holiday Time". This makes it easily identifiable to you and anyone else who views your calendar. Depending on the version of Teams and the organisation's settings, you might have the option to set the event type as "Out of Office". This means the event will show as "Out of Office" in both Teams and Outlook calendars, giving a clearer signal to others than a standard or private event might.
5. Specify dates and times: Select the start and end dates for your leave. Make sure the times reflect your entire workday. If your leave spans multiple days, make sure to set it as a continuous event for the duration of your leave.
6. Adjust visibility: Under the event options, choose how you want this leave to appear to others. If you prefer to keep it private, select ‘Private’; otherwise, leave it as a standard event so your team knows you're on leave.
7. Save the event: Once all details are set, click "Save" or "Send" to add this leave event to your calendar.
8. Set your OOO notifications. Unlike Outlook's "Out of Office" automatic replies, creating a leave event in Teams doesn't send automated responses to emails. You might want to set up "Out of Office" replies in Outlook separately to notify others who email you during leave.
9. Add attendees to inform them. When creating the leave event, you usually don’t need to add attendees since this is personal leave. But you do have the option to add relevant team members or supervisors as optional attendees, if this is the way you want them to remember you’re off.
10. Check your calendar: Finally, return to your calendar view in Teams to ensure your leave is displayed correctly. It should block out the specified days, indicating you're on leave.
Any changes made to events in Teams will also reflect in Outlook and vice versa. So when you're adding leave directly in the Microsoft Teams app, the information stays consistent across both platforms.
While this method works, you can see it's a massive faff and requires you to manually enter each leave period. This can be a bit of a faff, especially if you take plenty of days off (which we highly recommend).
That faff is why we're going to look at using Timetastic. Timetastic automates this whole process and syncs your leave directly into MS Teams, saving you plenty of manual data input, lots of time, and reducing the risk of errors.
Start your free trial of Timetatsic today.
Automatically add leave to your Microsoft Teams calendar via Timetastic 🎉
Here's your winner right here...
Timetastic streamlines the entire leave management process, from booking time off to updating your team's calendar effortlessly.
It’s much easier and nicer than going through all that manual data entry.
When team members want to book time off, fire up Timetastic (desktop or mobile app) choose their dates, choose the leave type (like holiday or sick leave), and click to submit their request.
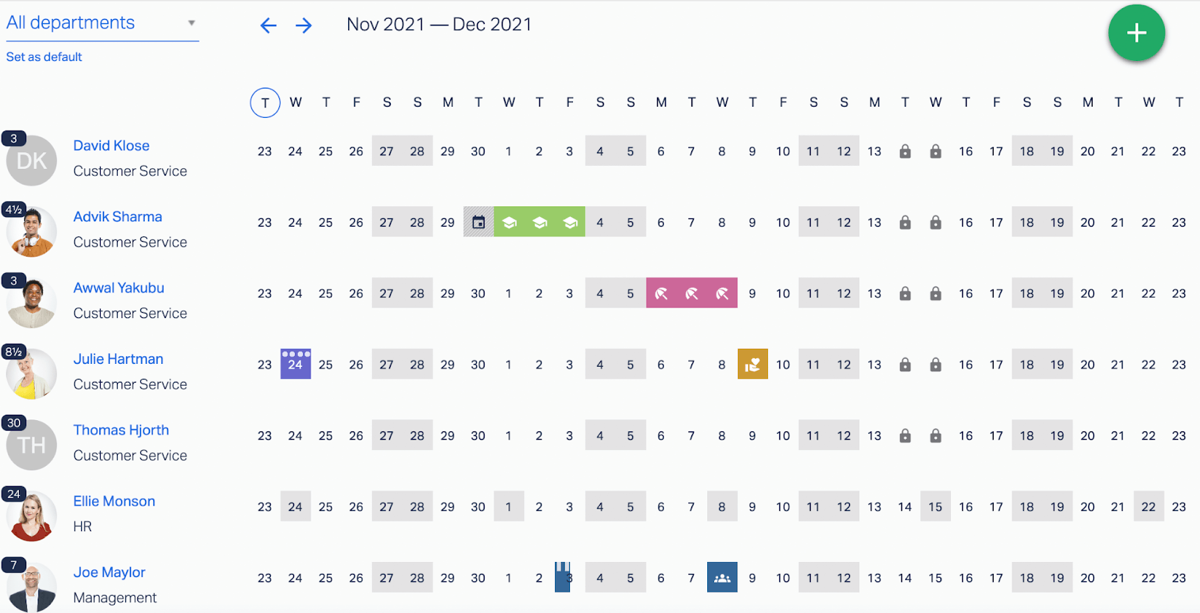
These requests are displayed on your company’s Wallchart in Timetastic, reflecting your org structure along with your various departments - AND synced immediately into your Microsoft Teams calendar!
The Wallchart, accessible to everyone, shows who's currently off or planning a holiday soon.
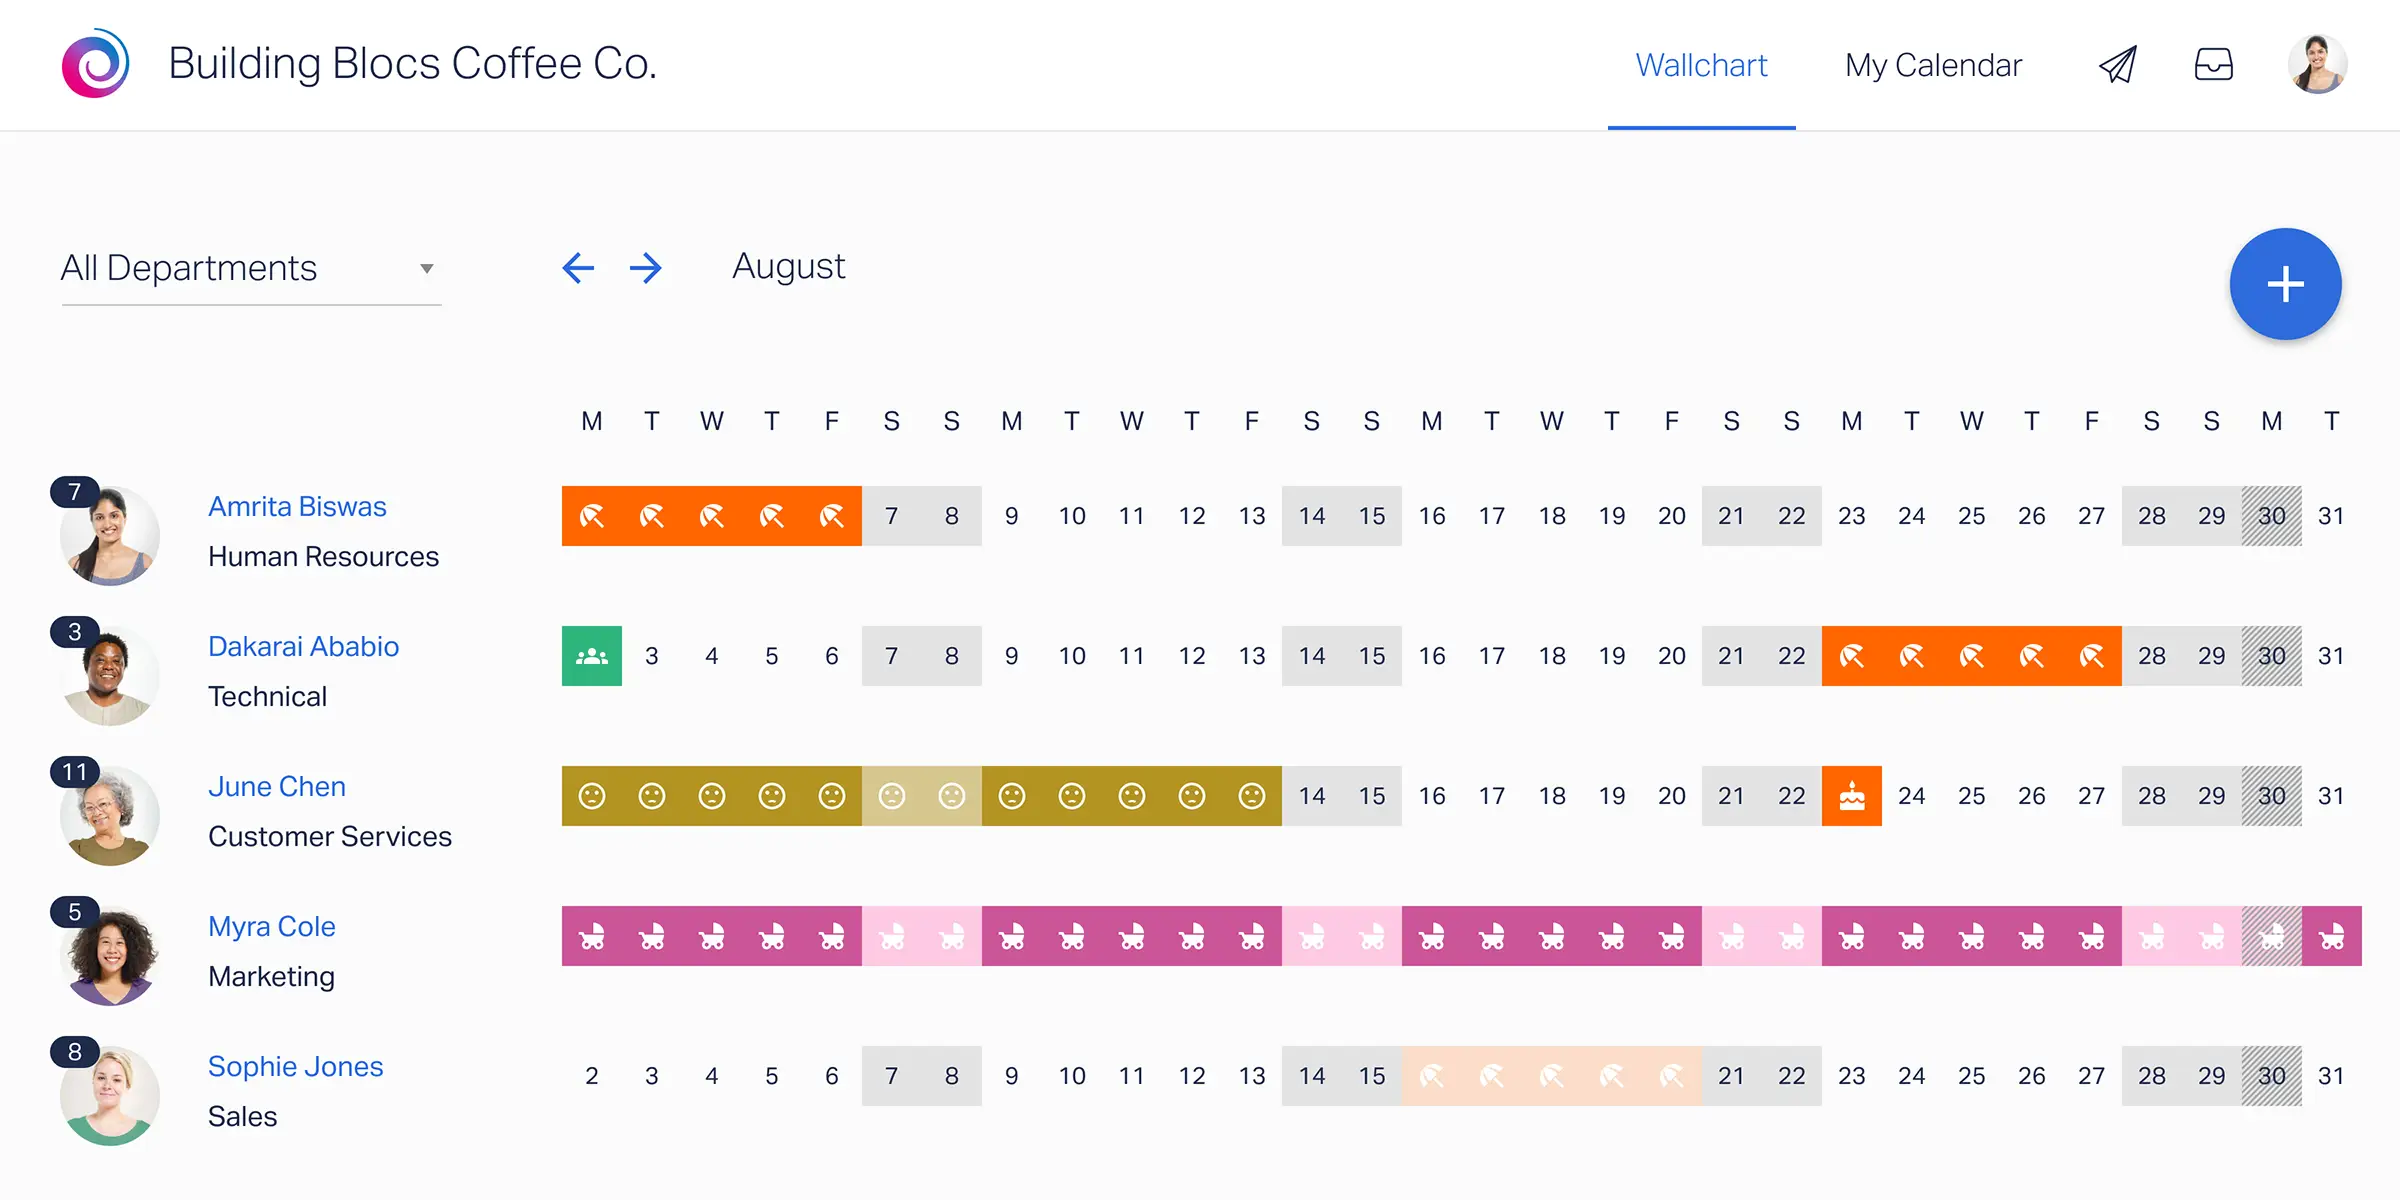
You can set up your Timetastic Wallchart to automatically sync your holiday bookings with your Microsoft Teams calendar through the calendar subscriptions. This means you get updates in real-time.
Just use the iCal URL from Timetastic to add the bookings you want to your Teams calendar. (Here’s how to get those iCal URLs).
Now, when someone books a holiday in Timetastic, it appears in your Teams calendar (along with your Outlook calendar as they are synced).
And clicking on an approved time off in Teams lets you see the reason for their leave. It's that straightforward. No need for duplicate efforts, and your team's calendar stays current and accurate.
It’s easier and more intuitive than using Excel spreadsheets or paper forms.
But hold on...
What if there was an even easier way to do all this?
Approve leave directly through Teams chat
With Timetastic, it’s super easy to respond to a leave requests from an employee. And you don’t even have to login to Timetastic to manage vacation time.
With a super-simple one-time setup, you track leave in Teams through the chat interface.
Through Teams, you’ll be able to:
- Approve or decline your team’s vacation requests
- Get a daily summary for any group to see who’s off
Once it’s set up, here’s what it looks like:
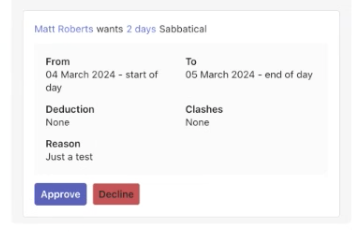
If you’re a manager, and one of your team members requests some leave, you'll get a direct message in Teams. You can then click to approve or deny a request within the Teams chat window. It’ll sync instantly with Timetastic and show up on your shared calendars.
You have the option for leave requests and notifications going through Teams, so instead of getting emails you’ll get direct messages. (While waiting for approval, it’ll show as ‘pending’ in Timetastic.)
Both manager and employee will get instant notifications for changes or cancellations.
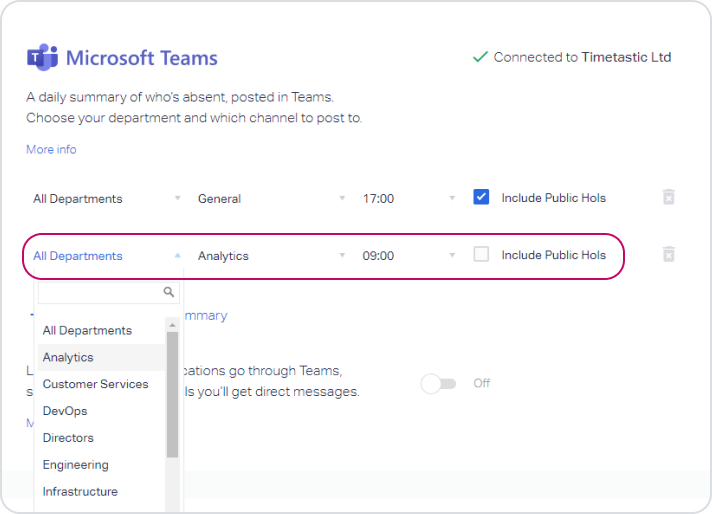
What’s more, you can easily set up a bot in Teams to keep you informed. Our Teams vacation tracker bot keeps track of any group that you define.
For example, you can have it automatically send a daily update post in your General channel. So at 9am each day you’ll be shown who’s away from work.

You can even define a particular group for your updates, like directors or supervisors. And it’ll even account for public holidays.
Not bad, right?
Automatic approvals
If you like, you can also set up automatic approval that maintains your desired number of people who are working on a given day. Here’s how:
1. First, you set your maximum absence levels. This is how many people you’re comfortable having off on any given day.
2. Then you lock your key dates. A locked date is when your team can’t take a holiday, whether that’s a particularly busy time or when you have certain deadlines.
With maximum absence levels and locked dates all set up, Timetastic will be able to approve or decline holiday requests without you having to manage them manually. This saves you even more time, while having the system in place means you don’t lose grip of staff holidays.
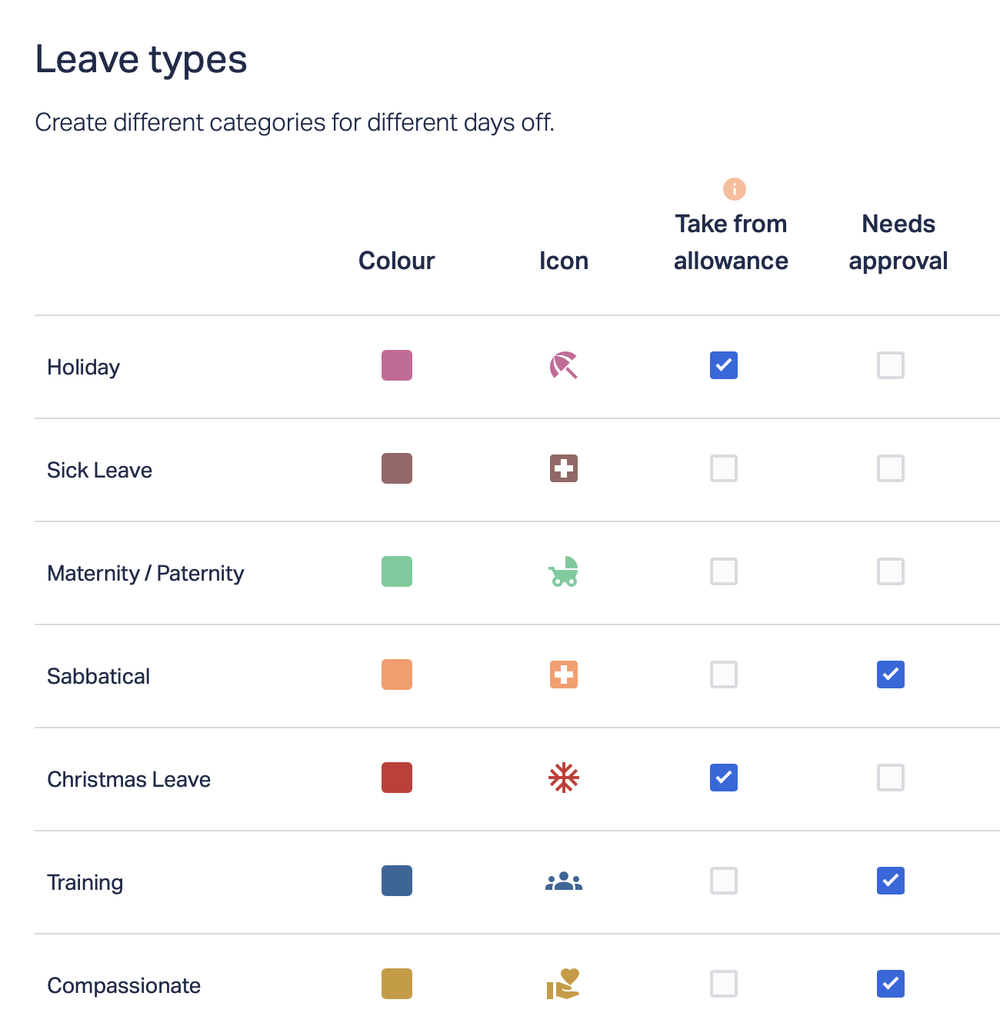
Note: You can also set all types of leave to “Needs Approval” and this means you get notified of every leave request. It’s totally up to you and what works best for your business.
Stay informed of everyone's annual leave
When a time off request is approved, your employee’s leave balance is automatically updated. So you'll always be able to see how much of their allowance each person has left to use.
And using our smart absence management software, Timetastic, you can see more detailed information.
When you log in to Timetastic, you can see individual balances on your company’s Wallchart. (In the left-hand corner next to everyone’s name is their updated annual leave balance):
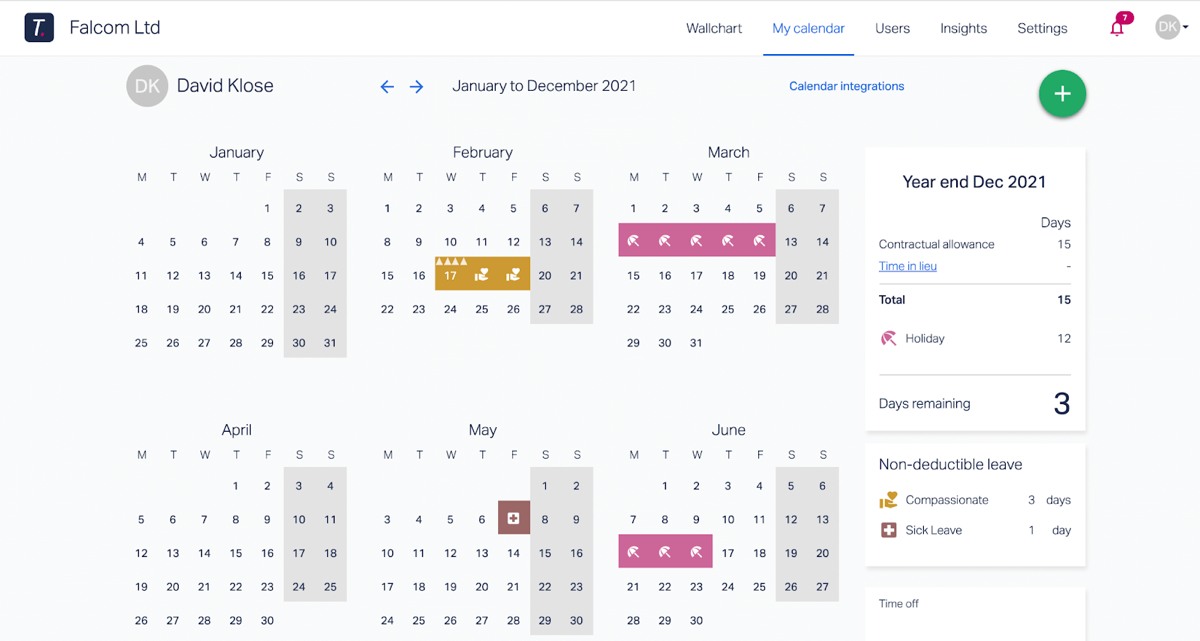
And you can also click on an individual employee to get a more detailed breakdown of how much time off they’ve taken in the year:
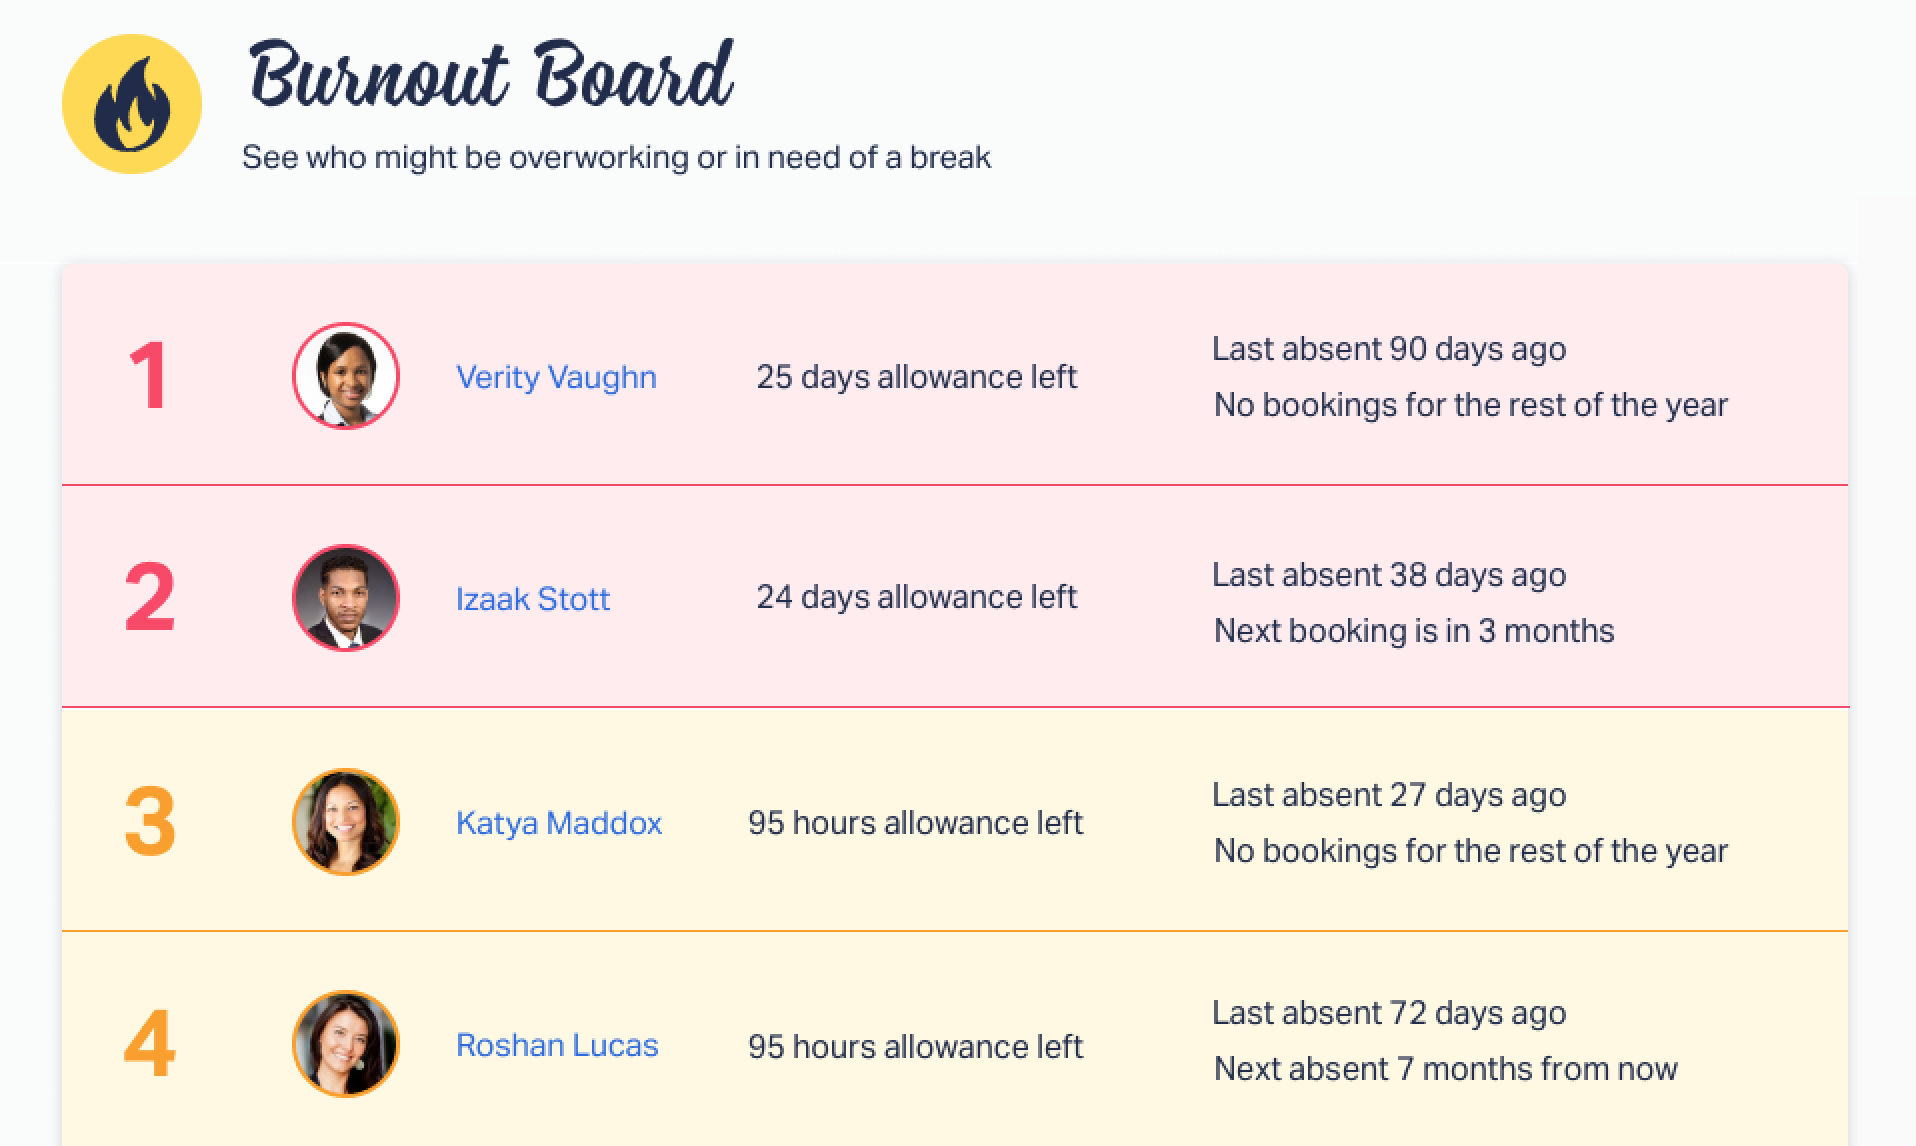
You can also click on Insights to see trends for your whole company along with their balances.
On your 'Absence Insights' page, you can see the most popular type of leave within your team, and when the busiest time of the year is for your team taking off. This is also where you find your team’s Burnout Board, telling you who is overdue some time off:
You can also get this information sent directly to you through automatic absence summaries. These summaries tell you who’s off for the upcoming week. They can be sent to your:
- MS Teams account
- Email inbox
- Slack account
Your next steps: simplify your leave management with Timetastic
While you can use your Teams calendar to share your time off and create a shared calendar for annual leave, let's be honest – it's a fair bit of effort. Even smaller firms with only a few teams will find it a time-consuming waste of effort.
Thousands of companies choose Timetastic for this exact reason. Because it’s built especially for annual leave.
And it plugs into your Teams calendar!
You can try Timetastic now for free, using our one-month free trial. You can:
- Approve and request leave directly through Teams.
- Keep track of everyone’s leave balances.
- Automatically sync with Teams calendars.
- Enjoy a user-friendly interface from a brand that cares about workers’ welfare.